Tips to Record High-Quality Audio & Improve Sound Quality for your Podcast

Advertisement

Recording high-quality audio is an essential part of producing a successful podcast. Your listeners expect clear and crisp audio, and if your audio quality is poor, they may tune out before getting to the substance of your content. As a podcaster, it’s important to prioritize audio quality, and there are several steps you can take to improve it. In this article, we’ll provide tips and techniques to help you record high-quality audio and enhance the sound quality of your podcast. From choosing the right microphone to editing and exporting your audio, we’ll cover everything you need to know to ensure that your podcast sounds its best. So, whether you’re a beginner or an experienced podcaster, read on to learn how to take your audio quality to the next level.

Advertisement

What do you need for high-quality recordings?

To achieve high-quality recordings, you’ll need the following:

  1. A high-quality microphone: The microphone is the most important component of your recording setup. A good microphone can capture your voice or instrument with clarity and detail, while a poor-quality microphone can make your recording sound muffled and distorted.
  2. A recording device: This can be a computer, a digital recorder, or a smartphone with a recording app. You need a reliable device that can record and save your audio files in a high-quality format.
  3. A quiet recording environment: Recording in a quiet environment is crucial for capturing clear audio. Avoid recording in noisy places or places with lots of echoes, as this can affect the quality of your recording.
  4. Headphones: Headphones are useful for monitoring your recording in real-time, which allows you to detect any background noise or technical issues before they ruin your recording.
  5. Pop filter: A pop filter helps to reduce plosive sounds caused by “P” and “B” sounds, which can be unpleasant to listen to.
  6. Audio editing software: You’ll need software to edit your audio files and remove any unwanted background noise or mistakes.
  7. Exporting your audio files in a high-quality format: When you’re finished editing your audio, you’ll need to export it in a high-quality format like WAV or FLAC. This will ensure that your podcast sounds great when it’s played on any device or platform.

By having these components, you can record high-quality audio that is clear, crisp, and engaging for your listeners.

Advertisement

What audio recording quality is best for Podcasting?

The recommended audio recording quality for podcasting is a minimum of 44.1kHz sample rate and 16-bit depth, in either mono or stereo. This is the standard for CD-quality audio, and it’s also commonly used in digital audio production.
Higher sample rates (such as 48kHz or 96kHz) and bit depths (such as 24-bit) can improve the overall sound quality of your recording, but they also result in larger file sizes and may not be necessary for podcasting. Most listeners will not notice a significant difference in sound quality between 16-bit and 24-bit audio.

Advertisement

It’s important to note that the quality of your recording is not solely determined by the sample rate and bit depth. Other factors such as microphone choice, recording environment, and proper gain staging are also crucial for achieving high-quality audio recordings.

Tips to Record High-Quality Audio

When it comes to recording high-quality audio for your podcast, choosing the right microphone is crucial. A microphone is the first point of contact between your voice and your audience, and it can significantly impact the overall sound quality of your podcast. With so many different types of microphones available in the market, it can be overwhelming to choose the right one. In this article, we will discuss some essential tips to help you choose the right microphone for your podcast. By the end of this article, you will be better equipped to make an informed decision and record high-quality audio that engages your audience.

Advertisement

Choosing the right microphone

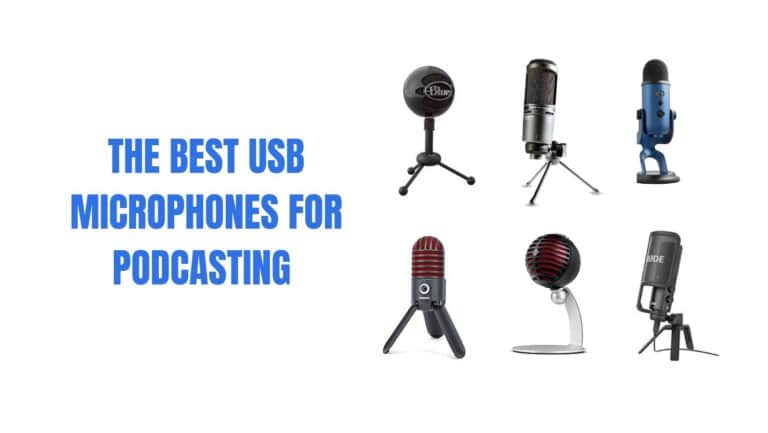
choosing the right microphone is a critical step in recording high-quality audio for your podcast. Here are some tips to help you choose the right microphone:

  1. Determine your budget: Microphones come in various price ranges, from a few dollars to several thousand dollars. Decide how much you are willing to spend before looking at the different options.
  2. Consider your recording environment: The type of microphone you choose will depend on the recording environment. If you record in a noisy environment, you will need a microphone that has excellent noise-cancellation properties. On the other hand, if you record in a studio or a quiet environment, you can choose a more sensitive microphone.
  3. Decide on the type of microphone: There are three main types of microphones: dynamic, condenser, and ribbon. Dynamic microphones are rugged and resistant to handling noise, making them ideal for live recordings. Condenser microphones are more sensitive and provide a more natural sound, making them ideal for studio recordings. Ribbon microphones are expensive and delicate but provide an exceptionally warm and natural sound.
  4. Choose the polar pattern: The polar pattern determines how the microphone captures sound. There are three main polar patterns: cardioid, omnidirectional, and bidirectional. Cardioid microphones capture sound from the front and reject sound from the sides and rear, making them ideal for single-person recordings. Omnidirectional microphones capture sound from all directions, making them ideal for recording groups or ambient sound. Bidirectional microphones capture sound from the front and rear, making them ideal for recording interviews.
  5. Read reviews: Before purchasing a microphone, read reviews from other podcasters or audio professionals. They can provide valuable insights into the microphone’s performance and help you make an informed decision.

Choosing the right microphone can significantly improve the sound quality of your podcast. By considering your budget, recording environment, type of microphone, polar pattern, and reading reviews, you can find the microphone that best suits your needs.

Advertisement

Finding the right recording environment

Finding the right recording environment is crucial for capturing high-quality audio for your podcast. Here are some tips for selecting the best location to record your podcast:

  1. Choose a quiet space: Look for a location that is free from any noise or distractions. A quiet room can help reduce background noise and provide a clean recording environment. Avoid recording in rooms with loud air conditioners, appliances, or traffic noise.
  2. Use a room with soft furnishings: A room with soft furnishings such as curtains, carpets, and furniture can help absorb sound waves and reduce echoes. Hard surfaces like concrete or hardwood floors can create echoes that can negatively affect the quality of your recording.
  3. Control the acoustics: If possible, choose a room with good acoustics. Rooms with good acoustics have balanced sound absorption and reflection, which can help provide a more natural and clear sound.
  4. Stay away from large empty spaces: Avoid recording in large empty spaces like gymnasiums or empty conference rooms. These types of rooms tend to have long reverberation times and can create echoes, making it difficult to capture a clear sound.
  5. Consider soundproofing: If you are unable to find a quiet room, consider soundproofing the space you intend to record in. Soundproofing can help block external noise and reduce echoes, creating a more controlled recording environment.

By following these tips, you can find the right recording environment for your podcast and capture high-quality audio that engages and resonates with your audience.

Advertisement

Understanding microphone placement and distance

Understanding microphone placement and distance is a critical aspect of recording high-quality audio for your podcast. Microphone placement and distance can have a significant impact on the quality and clarity of your recording. Here are some tips to keep in mind:

  1. Position the microphone close to the speaker: To capture the best sound quality, it’s important to place the microphone close to the speaker’s mouth. This helps to minimize background noise and other unwanted sounds that can compromise the quality of the recording.
  2. Use a microphone stand: A microphone stand is a useful tool for ensuring that your microphone stays in the right position throughout your recording. It also allows you to adjust the height and angle of the microphone as needed.
  3. Experiment with microphone direction: Depending on the type of microphone you are using, it may have a specific directionality pattern that affects how it captures sound. For example, a cardioid microphone will primarily capture sound from the front, while a bi-directional microphone will capture sound from the front and back. Experiment with different microphone positions and directions to find the best sound quality for your podcast.
  4. Keep the microphone away from unwanted noise sources: Background noise, such as fans, air conditioners, and other sources of ambient noise, can significantly reduce the clarity of your recording. Keep your microphone away from these noise sources to prevent them from interfering with your recording.
  5. Adjust the distance for different effects: The distance between the speaker and the microphone can affect the tone and clarity of the recording. Experiment with different distances to achieve the desired sound effect. For example, placing the microphone closer to the speaker can result in a more intimate and detailed sound, while moving the microphone further away can create a more spacious and ambient sound.

By understanding microphone placement and distance, you can achieve a high-quality audio recording that sounds professional and engaging.

Advertisement

Reducing background noise and echoes

Reducing background noise and echoes is an important aspect of improving the sound quality of your podcast. Here are some tips to help you minimize these issues:

  1. Choose a quiet recording space: One of the most effective ways to reduce background noise is to choose a quiet room to record in. Try to find a space that is away from any sources of noise such as traffic, appliances, or people talking. If possible, consider soundproofing your recording space to minimize outside noise.
  2. Use acoustic treatment: Acoustic treatment can help reduce echoes and other unwanted sound reflections in your recording space. This can be achieved by adding sound-absorbing materials such as acoustic foam panels or blankets to the walls, ceiling, and floor of your recording space. This can help to absorb sound waves and prevent them from bouncing back into the microphone.
  3. Use a directional microphone: A directional microphone, such as a cardioid or supercardioid microphone, is designed to pick up sound from a specific direction. By using a directional microphone, you can reduce the amount of ambient noise that is picked up by the microphone.
  4. Avoid using fans or air conditioning: Fans or air conditioning units can create a constant background noise that can be difficult to remove during post-production. If possible, turn off these appliances during recording sessions.
  5. Record during quiet times: If you can’t avoid recording in a noisy environment, try to schedule your recording sessions during quieter times of the day, such as early in the morning or late at night.

By following these tips, you can minimize background noise and echoes in your podcast recordings, resulting in a cleaner and more professional-sounding podcast.

Advertisement

Setting levels and gain properly

Setting levels and gain properly is an important aspect of recording high-quality audio for your podcast. Levels and gain refer to the volume of the audio signal, and if they are not set correctly, it can result in distorted or low-quality audio.

Here are some tips for setting levels and gain properly:

  1. Check your microphone level: Before recording, check the input level of your microphone. You can do this on your computer’s sound settings or your recording software. Adjust the input level until it is at an optimal level for your microphone.
  2. Don’t overload the signal: Recording with levels that are too high can result in distorted or “clipped” audio. To avoid this, make sure the levels are not peaking, and adjust the gain accordingly.
  3. Avoid recording with levels that are too low: Recording with levels that are too low can result in low-quality audio. Aim for a level that is not too quiet, but also not too loud.
  4. Use a preamp: A preamp is a device that amplifies the audio signal from your microphone before it enters your recording device. It can help to boost the gain and ensure a clear, strong signal.
  5. Use a limiter: A limiter is a tool that can be used to prevent audio from distorting when levels are too high. It works by setting a maximum threshold for the audio level, and when the signal reaches that threshold, it automatically reduces the gain to prevent distortion.

By following these tips, you can ensure that your levels and gain are set properly, resulting in high-quality audio recordings for your podcast.

Using a pop filter to prevent plosives

Using a pop filter is an essential technique to prevent plosives while recording audio for your podcast. Plosives are the sharp, popping sounds that are created when we speak certain letters, such as “p,” “b,” and “t.” These sounds can cause distortion in your audio recording and make it difficult for listeners to understand you.

A pop filter is a simple device that is placed between the speaker and the microphone. It works by diffusing the air that is expelled from the speaker’s mouth and preventing it from hitting the microphone directly. This, in turn, reduces the intensity of the plosive sounds, making your audio recording sound clearer and more professional.

Pop filters are available in various sizes and shapes, and they can be attached to your microphone in different ways. The most common type of pop filter is a circular mesh screen that is mounted on a flexible arm, which can be positioned at the desired distance from the microphone. Some pop filters are also designed to be clamped onto the microphone stand or boom arm.

When using a pop filter, it’s important to position it correctly. The filter should be placed about two inches away from your mouth and aligned with the center of the microphone. This will ensure that it captures the plosive sounds while still allowing your voice to be recorded clearly.

Overall, using a pop filter is a simple yet effective technique that can greatly improve the sound quality of your podcast recordings. It’s an inexpensive investment that can make a big difference in the clarity and professionalism of your audio.

Using headphones to monitor your recording

Using headphones to monitor your recording is an essential step to ensuring high-quality audio for your podcast. Headphones allow you to listen to your recording in real-time, so you can hear exactly what your listeners will hear. Here are some tips on using headphones to monitor your recording:

  1. Use closed-back headphones: Closed-back headphones are designed to block out external noise, which makes it easier to focus on the sound of your voice. They also prevent sound leakage, which can cause unwanted feedback in your microphone.
  2. Adjust the volume: Make sure the volume of your headphones is set to a comfortable level. If the volume is too low, you may not be able to hear subtle background noises or changes in your voice. If the volume is too high, it can cause ear fatigue and distort the sound.
  3. Listen for background noise: While recording, listen carefully for any background noise that may be picked up by your microphone. This could include things like traffic noise, dogs barking, or the sound of your computer’s fan. If you hear any background noise, try to eliminate it before continuing with your recording.
  4. Check for microphone placement: Use your headphones to check if your microphone is placed correctly. You should be speaking directly into the microphone, and it should be positioned at the right distance from your mouth. This will help to capture clear and consistent audio.
  5. Listen for clarity: Listen to your recording through your headphones to make sure your voice is clear and easy to understand. If your voice sounds muffled or distorted, you may need to adjust your microphone placement or adjust the levels and gain.

Overall, using headphones to monitor your recording can help you to create high-quality audio for your podcast. By paying attention to the sound quality and adjusting as necessary, you can ensure that your listeners will have a great listening experience.

Editing your recording to remove unwanted noise or mistakes

editing your recording is an important step to remove unwanted noise or mistakes, and ensure your podcast sounds polished and professional. Here are some tips on how to edit your recording:

  1. Use a good quality audio editing software: Choose an audio editing software that is user-friendly and suits your needs. Some popular options are Audacity, Adobe Audition, and GarageBand.
  2. Listen to the entire recording: Listen to the entire recording to identify any unwanted noise or mistakes such as coughing, sneezing, or a wrong pronunciation.
  3. Identify and remove unwanted noise: Identify unwanted noise such as background noise, humming, or electrical noise. Use a noise reduction tool to reduce or remove the unwanted noise.
  4. Cut out mistakes and pauses: Cut out any mistakes or long pauses to make the podcast flow smoothly. You can use the split tool to separate the audio file and delete the unwanted part.
  5. Use crossfades to smooth transitions: Use crossfades to smooth the transitions between edited parts. A crossfade is a gradual transition from one audio clip to another.
  6. Normalize your audio: Normalize your audio to ensure that the volume level is consistent throughout the recording.
  7. Use EQ and compression to enhance sound quality: Use EQ and compression to enhance the sound quality. EQ can help to boost or cut certain frequencies, while compression can help to balance the dynamic range.
  8. Listen to the final recording: Listen to the final recording to ensure that the sound quality is consistent and there are no errors.

By following these tips, you can edit your recording to remove unwanted noise or mistakes, and produce a high-quality podcast that your listeners will enjoy.

Compressing and equalizing your audio to enhance sound quality

Compressing and equalizing your audio are two techniques that can significantly enhance the sound quality of your podcast. Compressing helps to balance out the volume levels, while equalizing allows you to adjust the frequencies of the audio to create a more balanced and pleasing sound.

Here are some tips for compressing and equalizing your audio:

  1. Understand the basics: Compression is a technique that helps to even out the volume levels of your audio by reducing the dynamic range. Equalization is a technique that allows you to adjust the frequencies of your audio to create a more balanced sound.
  2. Use compression sparingly: While compression can help to improve the overall sound quality of your audio, it should be used sparingly to avoid over-compressing and making your audio sound unnatural. Use compression to even out the volume levels, but be careful not to squash the dynamics too much.
  3. Use a high-pass filter: A high-pass filter can help to remove low-frequency rumble and noise from your audio, making it sound cleaner and more polished.
  4. Use an equalizer to adjust frequencies: An equalizer allows you to adjust the levels of different frequencies in your audio. Use it to boost or cut frequencies that are too loud or too quiet, and to create a more balanced sound overall.
  5. Apply compression and equalization in the right order: Compression should be applied before equalization, as it can affect the overall balance of the audio. Apply compression first to even out the volume levels, and then use equalization to adjust the frequencies.
  6. Use presets as a starting point: Most audio editing software comes with a range of presets for compression and equalization. These can be a good starting point for adjusting the settings to suit your audio.
  7. Listen carefully: When compressing and equalizing your audio, it’s important to listen carefully to the changes you’re making. Use headphones to monitor your audio and make small adjustments until you’re happy with the sound.

By using these tips, you can compress and equalize your audio to create a more polished and professional sound for your podcast. However, it’s important to remember that every piece of audio is different, and what works for one recording may not work for another. Be prepared to experiment and make adjustments until you find the right balance for your specific audio.

Exporting your audio in a high-quality format

Exporting your audio in a high-quality format is crucial to maintaining the sound quality of your podcast. Here are some tips to help you export your audio in the best possible quality:

  1. Use a lossless audio format: When exporting your audio, use a lossless audio format like WAV or FLAC. These formats preserve the quality of your audio without any compression or loss of data.
  2. Set the sample rate: Set your sample rate to at least 44.1kHz. This is the standard for audio CDs and is a good compromise between file size and audio quality.
  3. Choose the right bit depth: Bit depth determines the dynamic range of your audio. For best results, choose 24-bit depth which provides a wider dynamic range compared to 16-bit depth.
  4. Use a high-quality encoder: When exporting your audio, use a high-quality encoder like LAME or AAC. These encoders provide a better compression algorithm and a better output quality.
  5. Avoid normalization: Avoid normalizing your audio during export as this can result in distortion or clipping. Instead, adjust your levels manually during the recording or editing process.
  6. Consider your platform: Consider the platform where you will be hosting your podcast. Some platforms may have specific requirements or limitations for audio file formats, sample rates, or bit depths.

By following these tips, you can ensure that your audio is exported in the highest quality possible, which will help your podcast to sound professional and engaging to your listeners.

Uploading your podcast to a hosting platform with good sound quality

uploading your podcast to a hosting platform with good sound quality is an essential step to ensure that your listeners can hear your content with clarity and without any interruptions. Here are some tips to consider when uploading your podcast to a hosting platform:

  1. Choose a reputable hosting platform: There are many hosting platforms available, but not all of them are equal in terms of sound quality, reliability, and features. Choose a reputable platform that offers high-quality sound and has a good reputation in the podcasting community.
  2. Check the storage and bandwidth limits: The storage and bandwidth limits can impact the sound quality of your podcast. Make sure the hosting platform you choose provides enough storage space and bandwidth to accommodate your episodes’ size and number.
  3. Optimize your audio files: Before uploading your podcast, make sure to optimize your audio files for the web. This can include compressing your audio files and saving them in an appropriate format, such as MP3.
  4. Use an RSS feed: An RSS feed is an essential component of podcast distribution. Make sure your hosting platform provides an RSS feed that is compatible with major podcast platforms, such as Apple Podcasts and Spotify.
  5. Provide a detailed description and metadata: When uploading your podcast, provide a detailed description of your show and each episode. Also, add relevant metadata, such as episode titles, show notes, and tags, to make it easier for listeners to discover your content.

By following these tips, you can ensure that your podcast sounds great and reaches a wider audience on a reputable hosting platform.

Creating a consistent sound quality across all episodes.

Creating a consistent sound quality across all episodes is important for your podcast because it helps to establish your brand and makes your content more enjoyable to listen to. Here are some tips on how to achieve a consistent sound quality:

  1. Use the same microphone and recording equipment: Using the same microphone and recording equipment for all episodes can help ensure a consistent sound quality. If you need to upgrade your equipment, make sure to test it before using it on a podcast episode.
  2. Maintain a consistent recording environment: Recording in the same location, with the same ambient noise level, can help create a consistent sound quality. Try to minimize any changes to the recording environment, such as moving furniture or changing the room layout.
  3. Use consistent settings for recording and post-production: Ensure that the settings for recording and post-production are consistent for all episodes. This includes levels, gain, EQ, compression, and other effects.
  4. Create a template for your podcast: Creating a template for your podcast can help ensure that all episodes have the same format, including intro and outro music, sound effects, and transitions. This can help create a consistent listener experience.
  5. Listen to your previous episodes: Listen to your previous episodes to make sure that the sound quality is consistent. If you notice any changes in sound quality, try to identify the cause and take steps to correct it.

By following these tips, you can create a consistent sound quality across all episodes of your podcast. This can help you establish your brand and create a more enjoyable listening experience for your audience.

FAQs On Record High-Quality Audio & Improve Sound Quality

Q: How can I choose the right microphone for my audio recording?

A: You can choose a microphone based on your needs and budget. Generally, dynamic microphones are best for recording in noisy environments, while condenser microphones are ideal for capturing high-quality audio in quiet environments.

Q: What is the best environment for recording audio?

A: A quiet and acoustically treated room is ideal for recording audio. You can also use sound-absorbing materials like acoustic panels, blankets, or foam to reduce background noise and echoes.

Q: How can I reduce background noise and echoes in my audio recordings?

A: You can reduce background noise by using a directional microphone, reducing the gain or sensitivity of your microphone, and adding sound-absorbing materials to your recording space. To reduce echoes, you can use sound-absorbing materials or position the microphone closer to the sound source.

Q: How can I set levels and gain properly?

A: Set levels and gain properly by adjusting the recording volume until your audio peaks at around -6dB to -12dB. Avoid recording at levels that are too low, as this can result in hiss and noise, or too high, which can cause distortion.

Q: How can I edit my audio recording to remove unwanted noise or mistakes?

A: You can use audio editing software like Audacity or Adobe Audition to remove unwanted noise, such as background hum or hiss, and edit out mistakes or pauses.

Q: How can I export my audio in a high-quality format?

A: Export your audio in a lossless format like WAV or AIFF to preserve the quality of your recording. If you need to compress your audio for distribution, use a high-quality compressed format like MP3 at a bit rate of 320 kbps.

Q: What is the highest quality audio recording?

A: The highest quality audio recording is generally considered to be a lossless audio format such as WAV or AIFF, recorded at a 24-bit depth and a sampling rate of at least 96kHz. These formats offer the most accurate representation of the original audio signal and preserve all the nuances and details of the recording.

Lossy formats such as MP3, AAC, or OGG, on the other hand, use compression algorithms to reduce the file size, which can result in a loss of audio quality, particularly in the high-frequency range.

It’s worth noting, however, that the highest quality audio recording format may not always be necessary or practical for all purposes, as it requires more storage space and can be more demanding on processing power. The choice of format will depend on factors such as the intended use of the recording, the available storage space, and the hardware and software used for playback.

Q: How to improve audio quality of a recording

A: There are several ways to improve the audio quality of your recordings. You can start by choosing the right microphone for your needs, finding a quiet recording environment, setting your levels and gain properly, and using a pop filter to prevent plosives. Additionally, you can use audio editing software to remove unwanted noise, compress and equalize your audio, and export your audio in a high-quality format.

Q: How can I reduce background noise in my recordings?

A: To reduce background noise in your recordings, you can try to record in a quiet environment and use a noise gate or noise reduction plugin during the editing process. You can also use a directional microphone that focuses on the sound source and minimizes background noise.

Q: How can I prevent echoes in my recordings?

A: To prevent echoes in your recordings, you can use acoustic treatment such as foam panels or blankets to absorb sound reflections. You can also try to record in a smaller space or use a microphone with a tighter pickup pattern.

Q: What is the best format for exporting audio recordings?

A: The best format for exporting audio recordings depends on the intended use of the recording. For podcasting, a common format is MP3 with a bit rate of 128 kbps or higher. For professional audio production, lossless formats such as WAV or AIFF may be preferred.

Q: Should I use headphones when recording audio?

A: Yes, using headphones when recording audio can help you monitor your recording and ensure that you are capturing high-quality audio. Headphones also help prevent sound leakage and minimize the risk of feedback or echo during recording.

Q: How to improve audio quality of a recording online?

A: You can improve the audio quality of your recording online by using an audio editing software. There are many free and paid audio editing software available online that you can use to edit and enhance your audio recordings. Some popular audio editing software includes Audacity, GarageBand, Adobe Audition, and Reaper.

Q: What are some common audio issues that can be fixed during editing?

A: Some common audio issues that can be fixed during editing include background noise, hiss, hum, echoes, clipping, distortion, and uneven volume levels. Using an audio editing software, you can reduce or remove these issues to improve the overall sound quality of your recording.

Q: How can I remove background noise from my audio recording?

A: To remove background noise from your audio recording, you can use the noise reduction or removal tool in your audio editing software. First, select a section of your audio where there is only background noise, and capture it as a noise profile. Then, select the entire audio file and use the noise reduction tool to reduce the background noise. You can adjust the settings to find the right balance between removing the noise and preserving the audio quality.

Q: How can I normalize the volume of my audio recording?

A: You can normalize the volume of your audio recording by using the normalize tool in your audio editing software. The normalize tool will adjust the volume of your audio file so that the loudest part of the audio reaches a desired level. This can help to even out the volume levels and make the audio easier to listen to.

Q: What is EQ and how can I use it to improve my audio quality?

A: EQ stands for equalization and is a tool that can be used to adjust the frequency balance of your audio recording. By adjusting the EQ, you can enhance certain frequencies and reduce others to improve the overall sound quality. For example, you can boost the high frequencies to make the audio sound brighter, or reduce the low frequencies to remove unwanted bass. Using the EQ tool can help to make your audio sound more balanced and clear.

Q: Can I record good quality audio on my phone?

A: Yes, you can record good quality audio on your phone. However, the quality of the audio will depend on several factors, including the microphone quality, the recording environment, and the recording app you are using.

Q: How do I choose the right recording app?

A: There are several recording apps available for both iOS and Android devices. Choose an app that has features like noise reduction, gain control, and file compression. Some popular recording apps are Voice Memos for iOS and Hi-Q MP3 Recorder for Android.

Q: How can I improve the recording environment?

A: Try to find a quiet location to record your audio. You can use a closet or a small room with lots of soft materials, like carpets or blankets, to absorb the sound. Avoid recording in a large, echoey room.

Q: How should I position my phone for recording?

A: The microphone on your phone is usually located at the bottom or top of the device. Hold your phone close to your mouth, and try to position it so that the microphone is facing you. Use a stand or tripod if you need to keep your phone steady.

Q: What can I do to reduce background noise?

A: Close windows and doors to block out outside noise. Turn off fans, air conditioners, or any other sources of noise in the room. You can also use a noise reduction feature in your recording app to remove unwanted noise.

Q: How can I edit my audio recording?

A: There are many audio editing apps available for both iOS and Android devices. Some popular options are GarageBand for iOS and WavePad Audio Editor for Android. You can use these apps to trim the audio, adjust the levels, and add effects.

Q: How to improve audio recording quality on iPhone?

A: If you are looking to improve the audio recording quality on your iPhone, here are some tips that might help:

  1. Use an external microphone: Using an external microphone can significantly improve the sound quality of your recordings. There are many affordable options available in the market that can be plugged into your iPhone’s Lightning port.
  2. Record in a quiet environment: Background noise can be a major hindrance to good audio quality. Try to record in a quiet room with minimal ambient noise.
  3. Keep the microphone close to the subject: If you are recording someone speaking, make sure the microphone is positioned close to the person’s mouth. This can help capture clearer audio.
  4. Use the Voice Memos app: The Voice Memos app on the iPhone is a great tool for recording audio. It allows you to easily record, edit and share your recordings.
  5. Turn off noise reduction: If you are recording in a quiet environment, it is recommended to turn off the noise reduction feature on your iPhone. This can help preserve the natural sound of your recording.
  6. Use a windscreen: If you are recording outdoors, a windscreen can help reduce wind noise and improve the overall audio quality.

By implementing these tips, you can improve the audio recording quality on your iPhone and create better recordings for your podcast or other audio projects.

About Author

The Podcasting Research Team is a dynamic and passionate group of young researchers who are dedicated to exploring the world of podcasting. Whether you’re a podcast creator, a marketer, or simply a curious listener, the work of The Podcasting Research Team can provide valuable insights into the trends and best practices in the podcasting world.

Advertisement

Leave a Reply

Your email address will not be published. Required fields are marked *